How To Use ?
Everything you need to know about using our label creation features clearly explained, tool by tool.
How to Use the Label Configurator
Watch a step-by-step example showing how to create woven or printed labels and place a production-ready order.
Select Label Type — Woven or Printed
Label Configurator opens with the Woven Label option selected by default. If you’re designing a woven label instead, simply switch to the Woven Label tab at the top of the interface.
Woven Labels are created by weaving threads into fabric, offering a durable, textured finish—perfect for brand tags and long-lasting use.
Printed Labels are ideal for high-definition, colorful designs and text on fabric like satin or cotton.
Not sure which to choose? Printed is best for soft, detailed visuals. Woven is best for texture, durability, and minimal design.
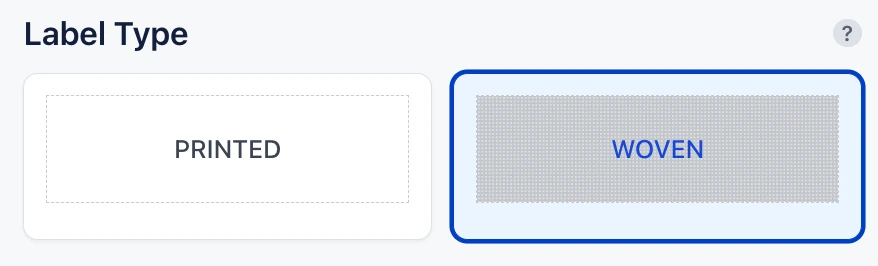 📷 Woven Label
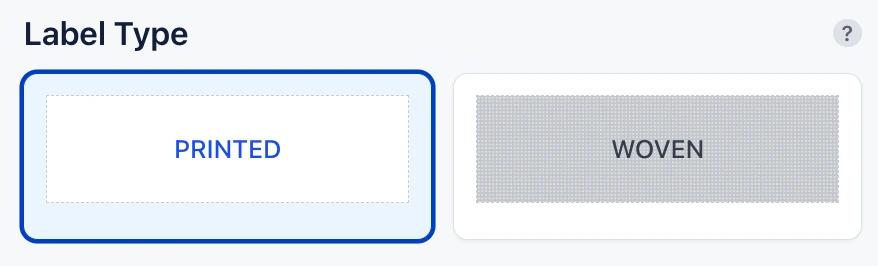 📷 Printed Label
Choose Your Weaving Quality or Material
Woven Labels – Weave Quality:
- Eco: Economical basic weave (52 destiny)
- Standard: Balanced quality and detail (60 destiny)
- Premium: High-density weave for sharp icons and text (70-80 destiny)
Printed Labels – Fabric Options:
- Satin: Smooth, shiny, elegant finish
- Woven Edge Satin: Stronger, sealed edges
- Cotton: Soft, natural look
- White Cotton: Clean, bright white background
Your choice impacts both the texture and final appearance. A live preview updates instantly with every selection.
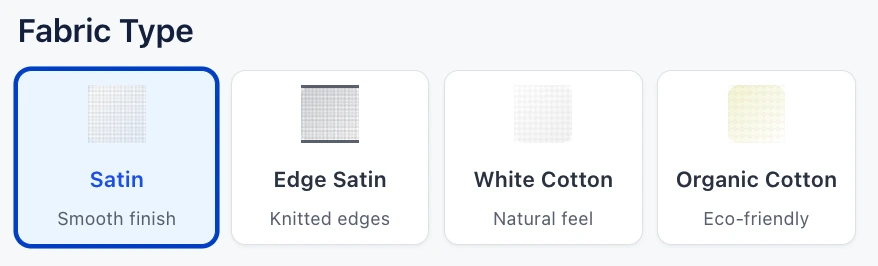 📷 Fabric Selection
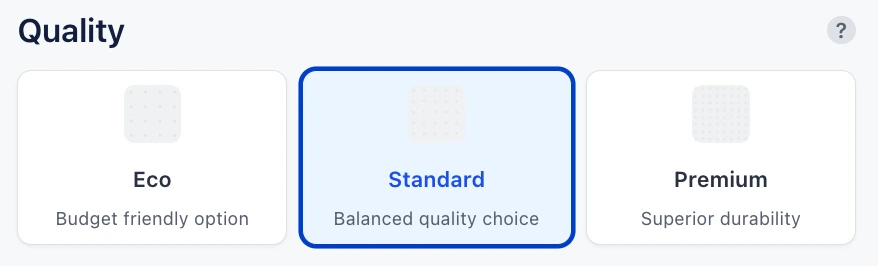 📷 Weave Quality
Select Label Fold Style
Choose your preferred folding type:
- End Fold
- Straight Cut
- Center Fold
- Manhattan Fold
- Hanger Loop
- Book Fold
If you require a different fold type or laser cutting, please contact us directly.
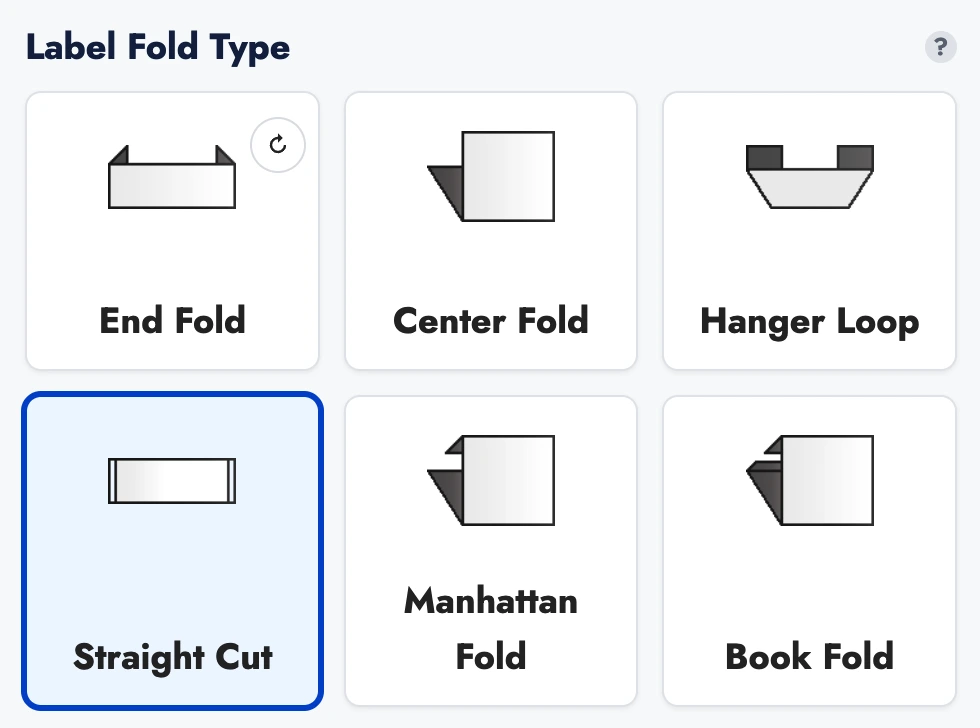 📷 Fold Types
Set Label Dimensions
Adjust your label’s width and height to match your needs.
- Width: 10 mm – 65 mm (0.4″ – 2.6″)
- Height: 30 mm – 150 mm (1.2″ – 5.9″)
The canvas updates dynamically so you can visualize your label in real size.
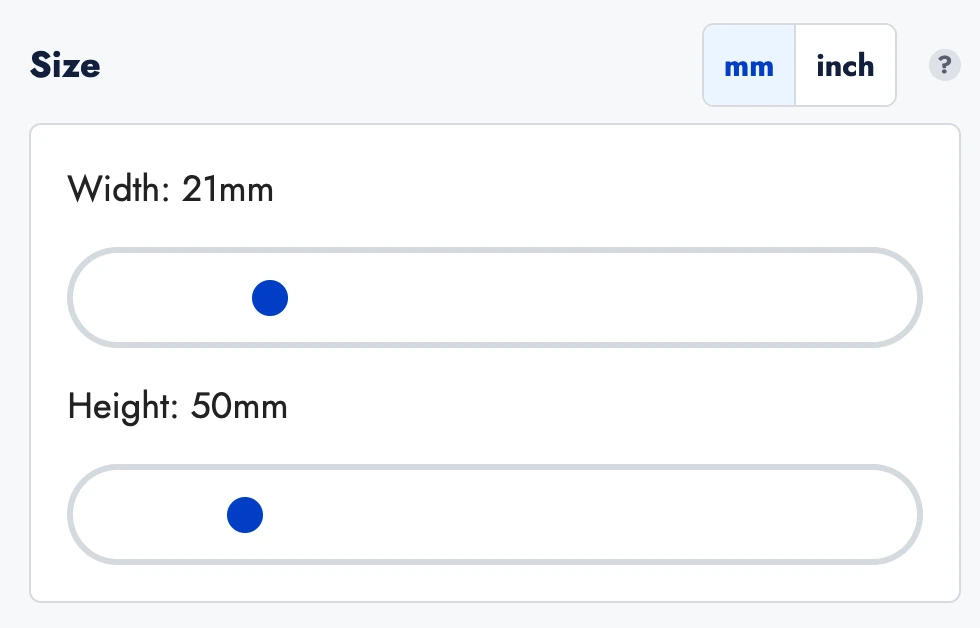 📷 Dimensions
Upload Your Design File
Upload your artwork in .bmp, .png, or .jpg format.
- Zoom in/out
- Adjust position
- Rotate if needed
This ensures your design is perfectly aligned within the label area.
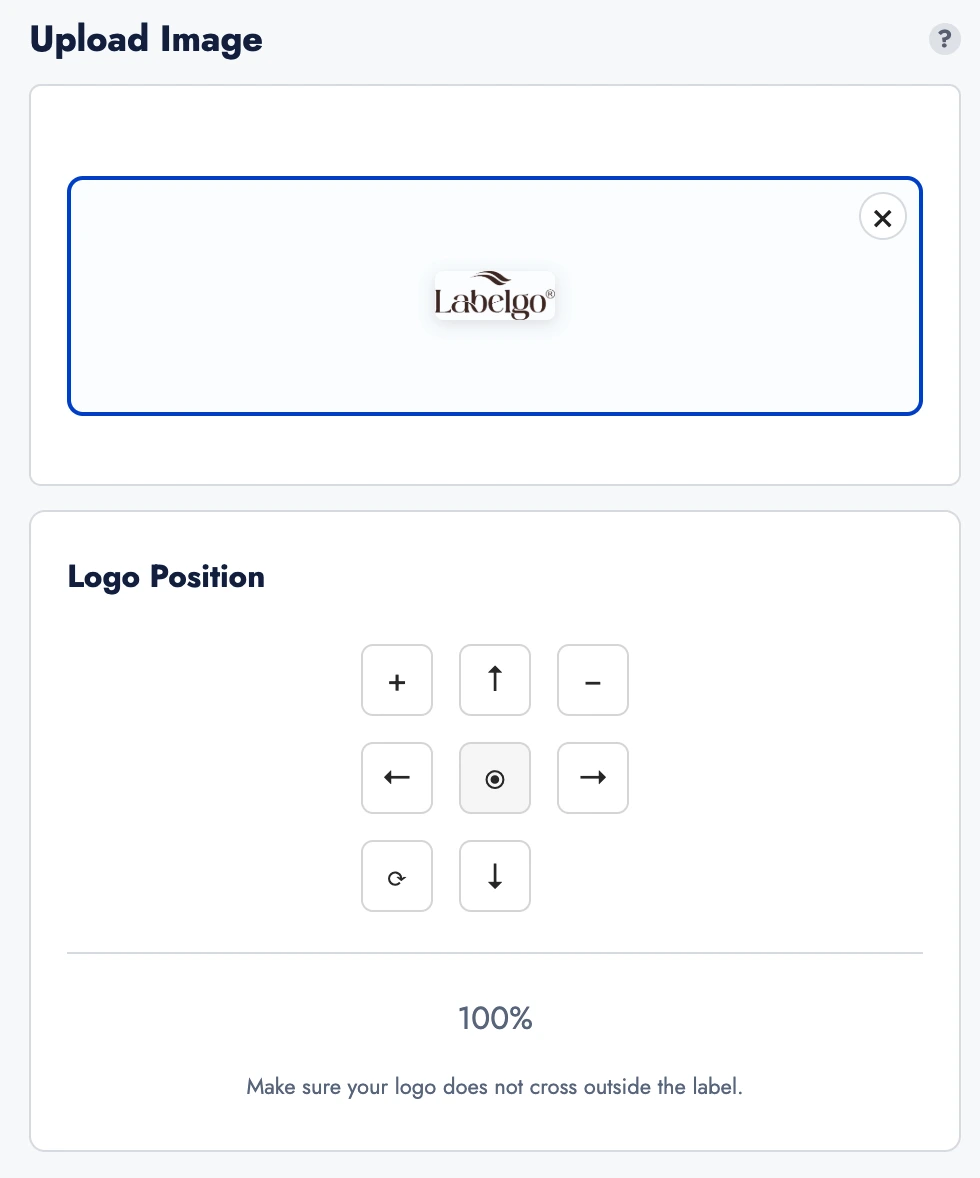 📷 Design Upload
Define the Number of Colors
For production, your design (including background) must not exceed 8 colors.
Our system automatically optimizes your file to a maximum of 8 colors.
A dynamic preview shows the filtered version instantly. If the filtered version doesn’t look accurate, please contact us for assistance.
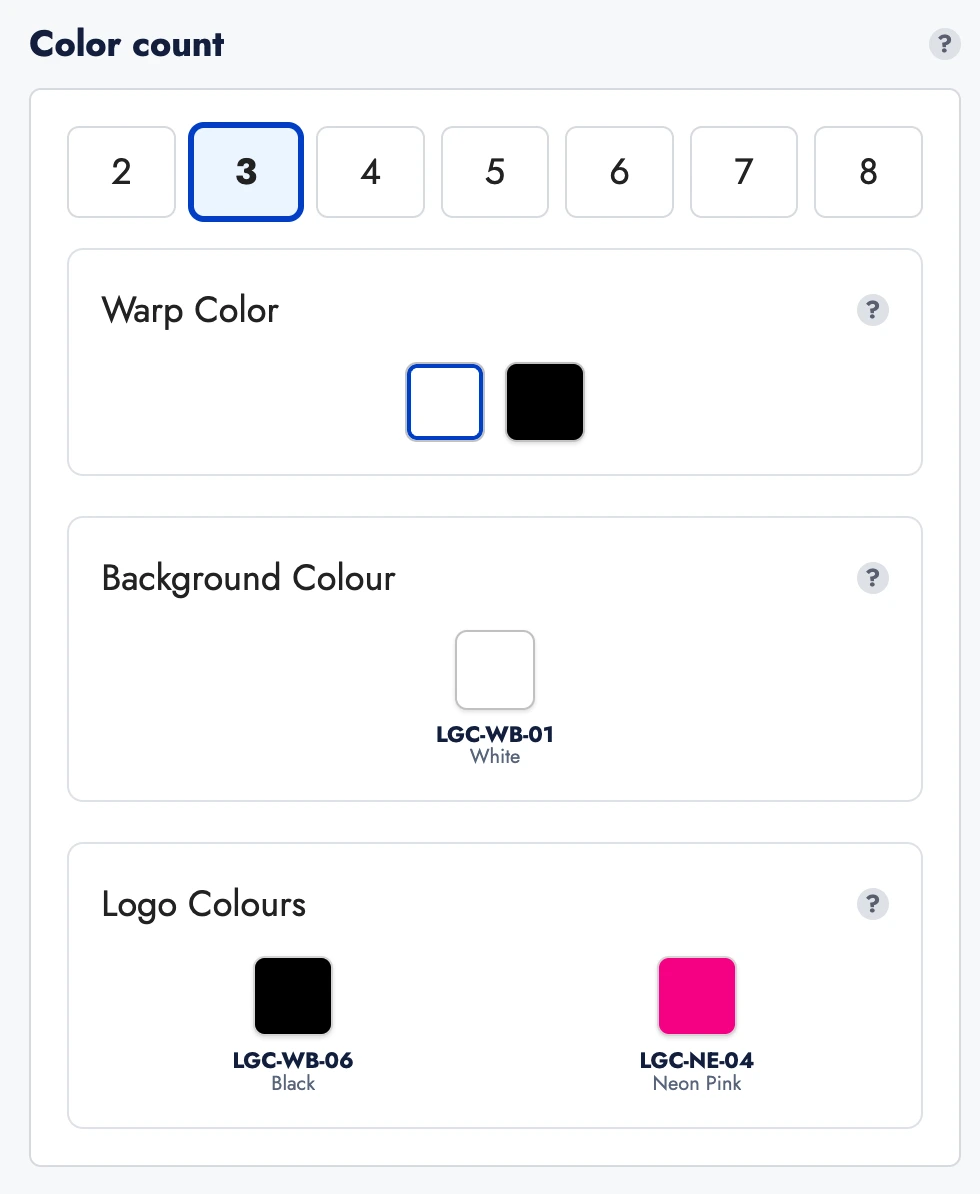 📷 Color Count
Customize Colors
Warp Color (Woven Labels only): Choose either black or white for the vertical base thread.
Background Color: Set according to your design.
Logo Colors: Customize freely.
If your desired shade isn’t available, you can provide a Pantone code by contacting us.
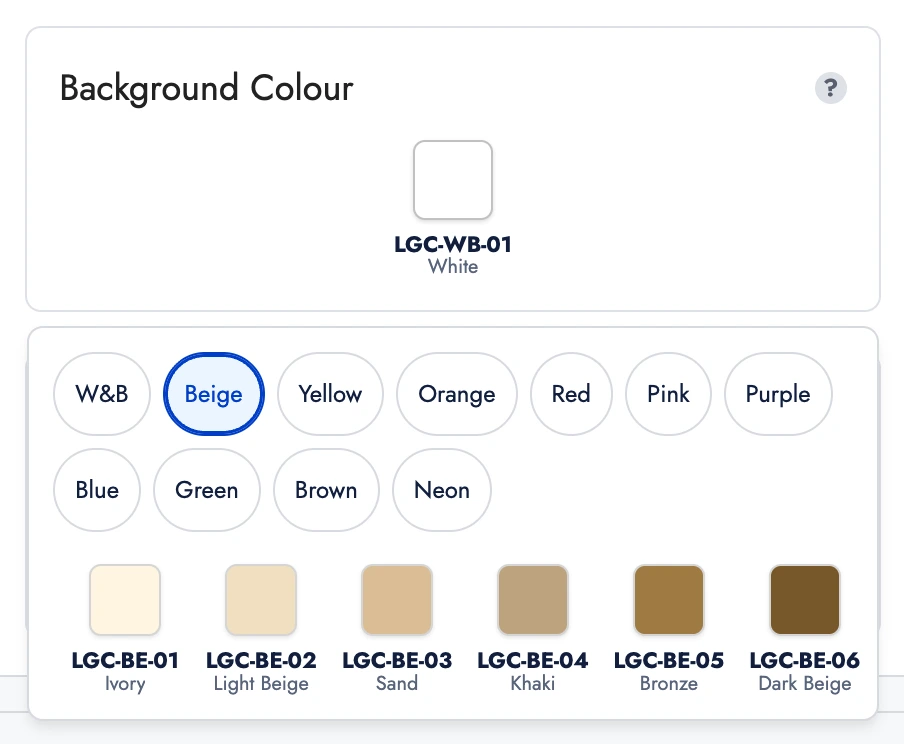 📷 Color Swatches
Select Application Method & Enhancements (Woven Labels Only)
Application Options:
- Fold & Seam Allowance: For stitching into garments
- Iron-On Adhesive: Heat-applied, no sewing required
Optional Enhancements:
- Ultrasonic Cutting: Smooth, fray-free edges
- Double Ground: Extra fabric layer for more structure & opacity
These upgrades enhance durability and deliver a professional finish.
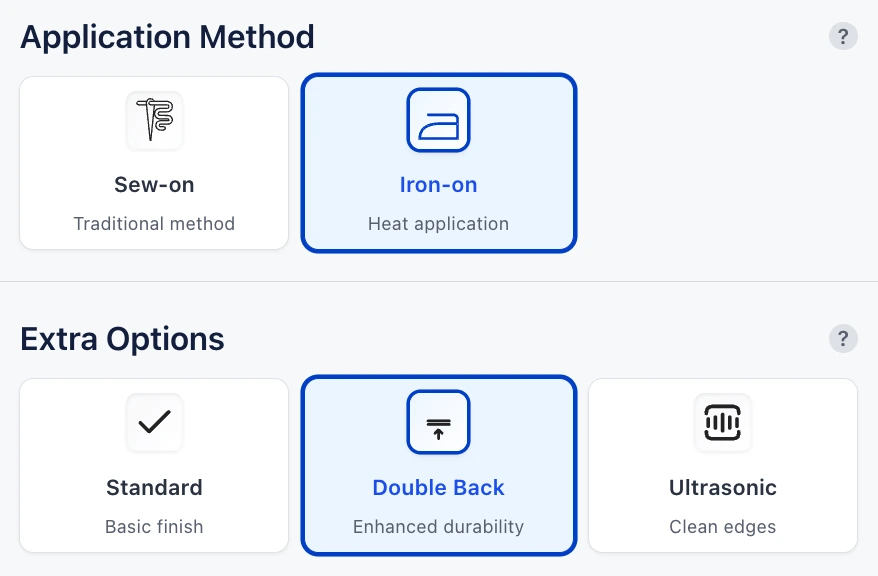 📷 Finishing Options
Set Quantity & Add to Cart
Select the quantity that fits your production needs.
Click Add to Cart to complete your label design.
All customizations are saved and sent to production with no loss of quality or detail.
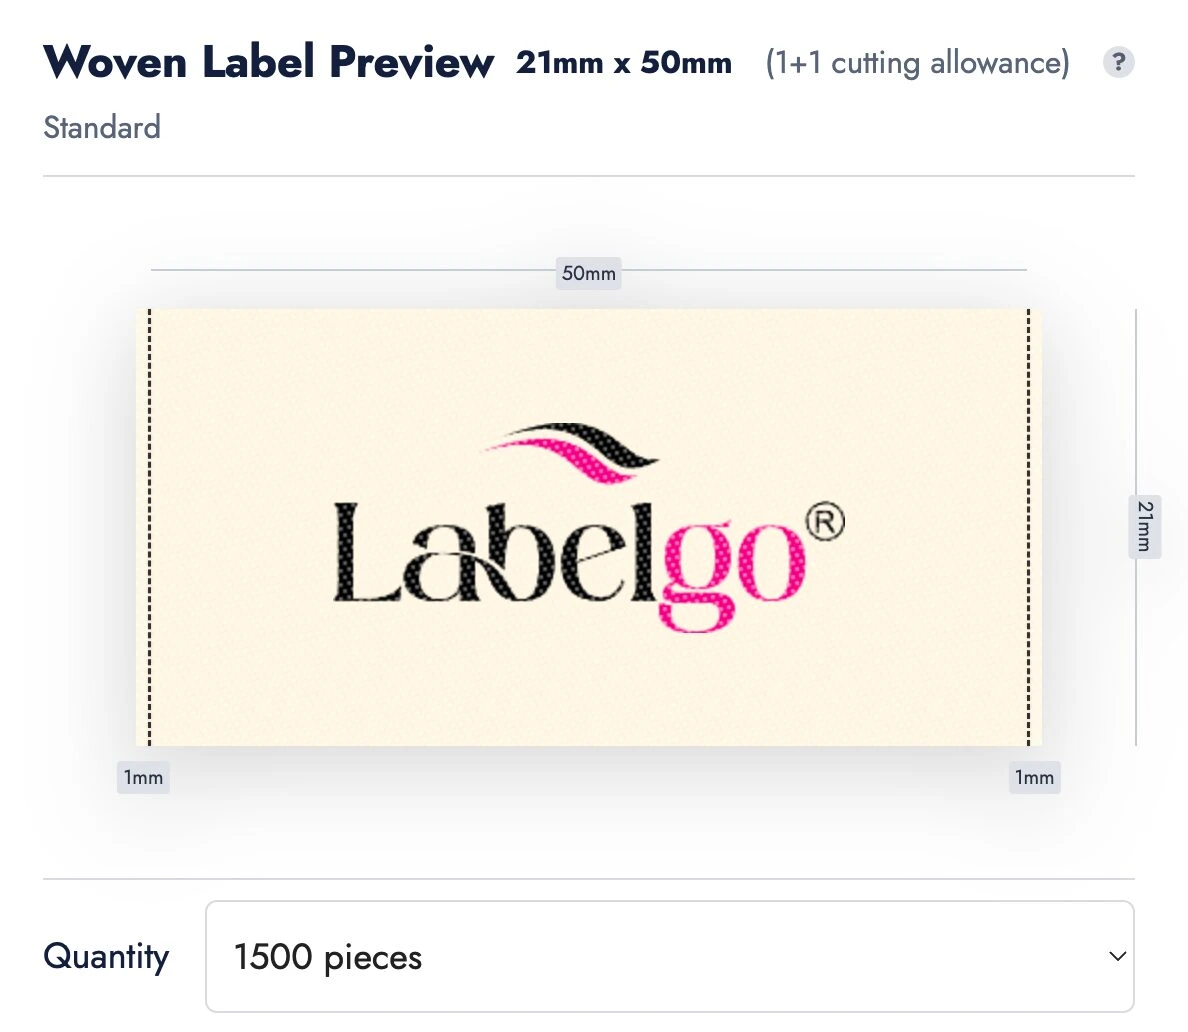 📷 Order Mockup
You’re Ready to Produce with Precision
With LabelGo’s Label Configurator, you’re now fully equipped to transform your designs into premium woven labels produced with precision and tailored exactly to your needs. It’s the easiest way to ensure your label matches your vision.
Label Configurator →Looking for More Customization?
Looking for a special weave, advanced folding option, or extended color range? We offer fully personalized solutions. Please don’t hesitate to contact us for advanced customization tailored to your brand’s specifications.
Contact Us →How to Use Label Studio
Watch a step-by-step example showing how to create text-based labels quickly and place a production-ready order.
Select Label Type — Printed or Woven
Label Studio opens with the Woven Label option selected by default. If you’re designing a woven label instead, simply switch to the Woven Label tab at the top of the interface.
Woven Labels are created by weaving threads into fabric, offering a durable, textured finish—perfect for brand tags and long-lasting use.
Printed Labels are ideal for high-definition, colorful designs and text on fabric like satin or cotton.
Not sure which to choose? Printed is best for soft, detailed visuals. Woven is best for texture, durability, and minimal design.
📷 Woven Label
📷 Printed LabelChoose Your Material or Weaving Quality
Woven Labels – Weave Quality:
- Eco: Economical basic weave (52 destiny)
- Standard: Balanced quality and detail (60 destiny)
- Premium: High-density weave for sharp icons and text (70-80 destiny)
Printed Labels – Fabric Options:
- Satin: Smooth, shiny, elegant finish
- Woven Edge Satin: Stronger, sealed edges
- Cotton: Soft, natural look
- White Cotton: Clean, bright white background
Your choice impacts both the texture and final appearance. A live preview updates instantly with every selection.
📷 Fabric Selection
📷 Weave QualitySet Label Size
Pick your preferred label dimensions from predefined sizes. The canvas dynamically adjusts to reflect your choices in real time, helping you visualize the final product. Accurate sizing ensures your label integrates well with your product packaging or garment.
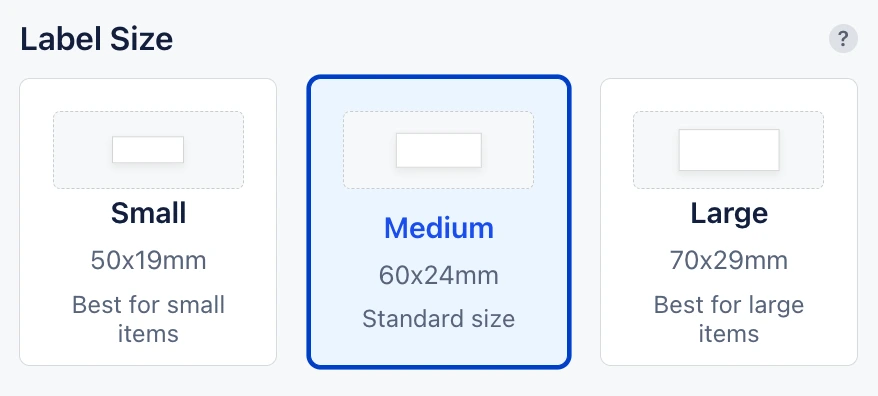 📷 Preset Sizes
Add and Customize Text
Type in your product name, brand slogan, or any other text. Then customize:
- Font size
- Alignment: Left, Center, Right
- Position: Adjust placement vertically and horizontally
This ensures your label layout looks balanced and readable.
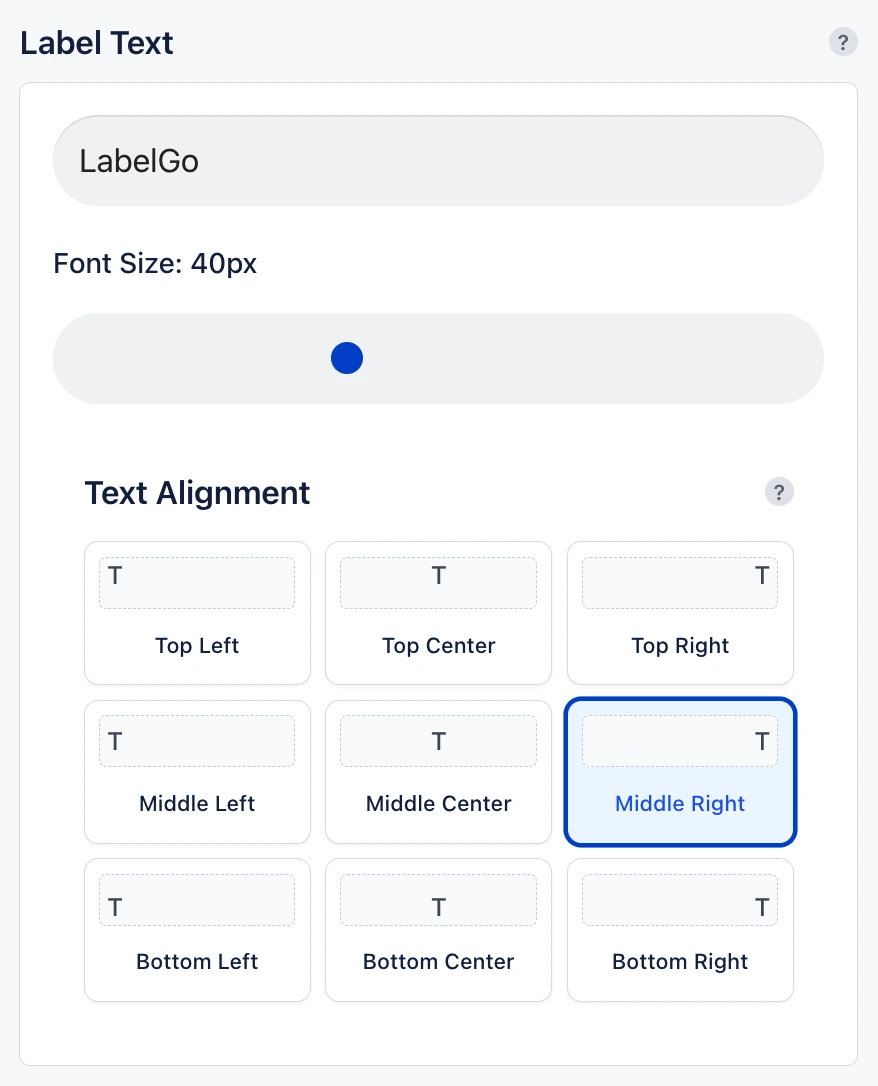 📷 Text Controls
Select Font Style
Select from a variety of fonts designed to fit different aesthetics—minimalist, playful, classic, or bold. Choose one that aligns with your brand identity or product feel.
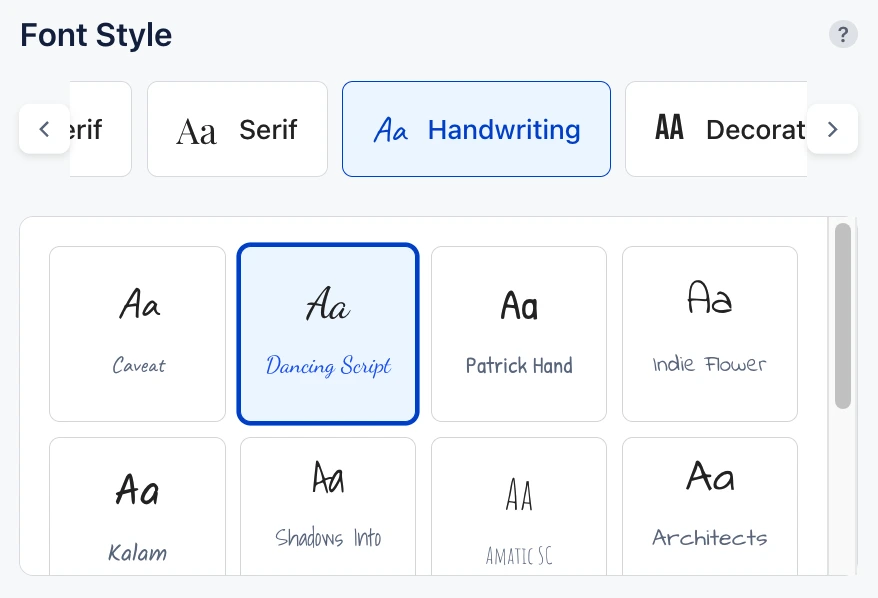 📷 Font Styles
Add Icons (Optional)
Visual icons can communicate brand personality, sustainability.
With Label Studio you can:
- Insert icons to the left, right, or both sides of the text
- Preview placements instantly
- Use symbolic or decorative icons to enrich your design
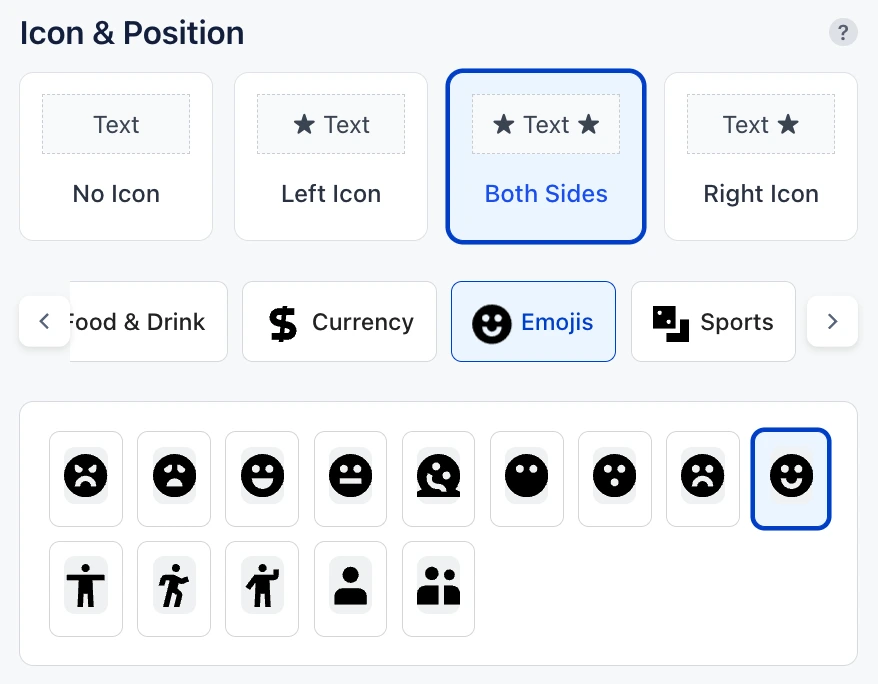 📷 Icon Placement
Add a Frame (Optional)
You can emphasize your label content by adding:
- Single Line Frame
- Double Line Frame
Frames help define the visual boundaries of your label and add a sense of polish.
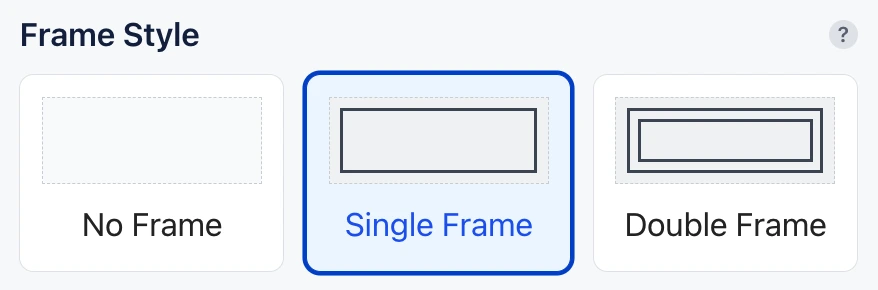 📷 Border Frame
Set Colors & Background
Customize color elements to match your brand:
- Printed Labels: Choose text and frame colors
- Woven Labels: Choose text, frame, and background color
All color selections are previewed live. LabelGo’s professional color palette ensures consistency across all labels.
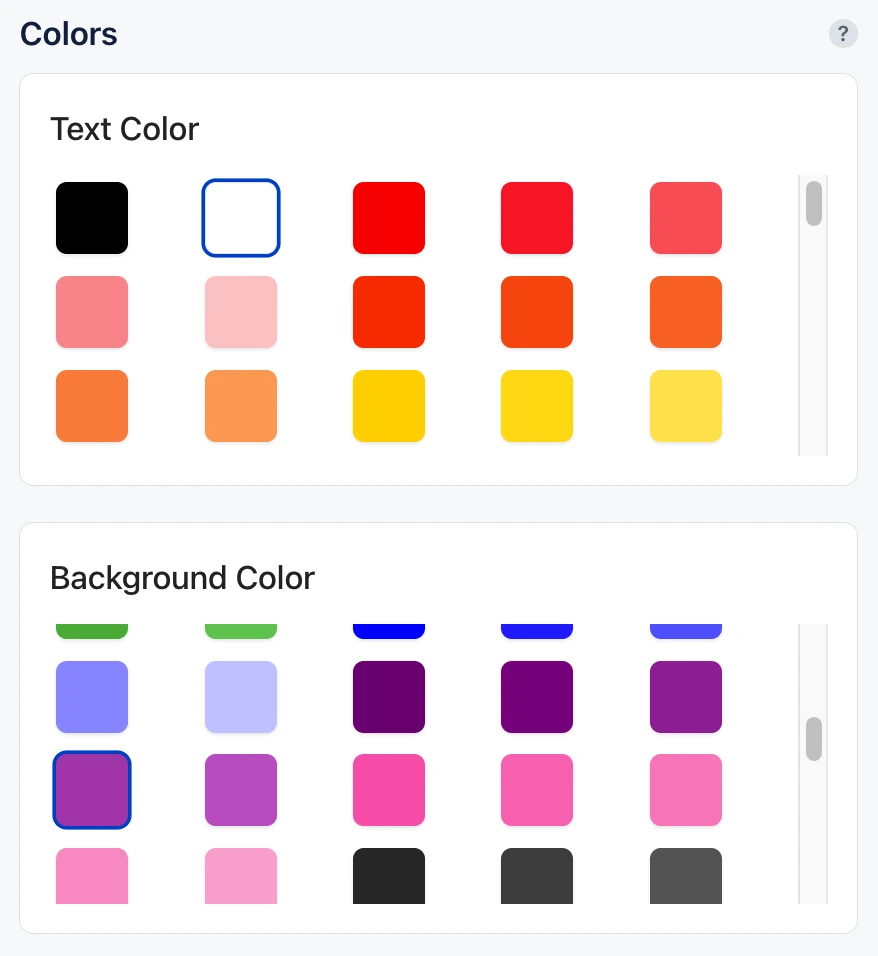 📷 Color Palette
Choose Application Method & Optional Enhancements (Woven Labels Only)
For woven labels, choose how the label will be attached to your product:
- Fold & Seam Allowance: For stitching into clothing
- Iron-On Adhesive: For heat-based application (no sewing)
Optional Enhancements:
- Ultrasonic Cutting: Clean edges that won’t fray
- Double Ground: Extra fabric layer for structure & opacity
These features improve durability and professional finish.
📷 Application MethodSet Quantity and Add to Cart
Once your label is perfectly designed:
- Choose the quantity that matches your production needs
- Click Add to Cart to finalize your design and proceed to checkout
All your customizations are saved and carried through to production without any loss in quality or detail.
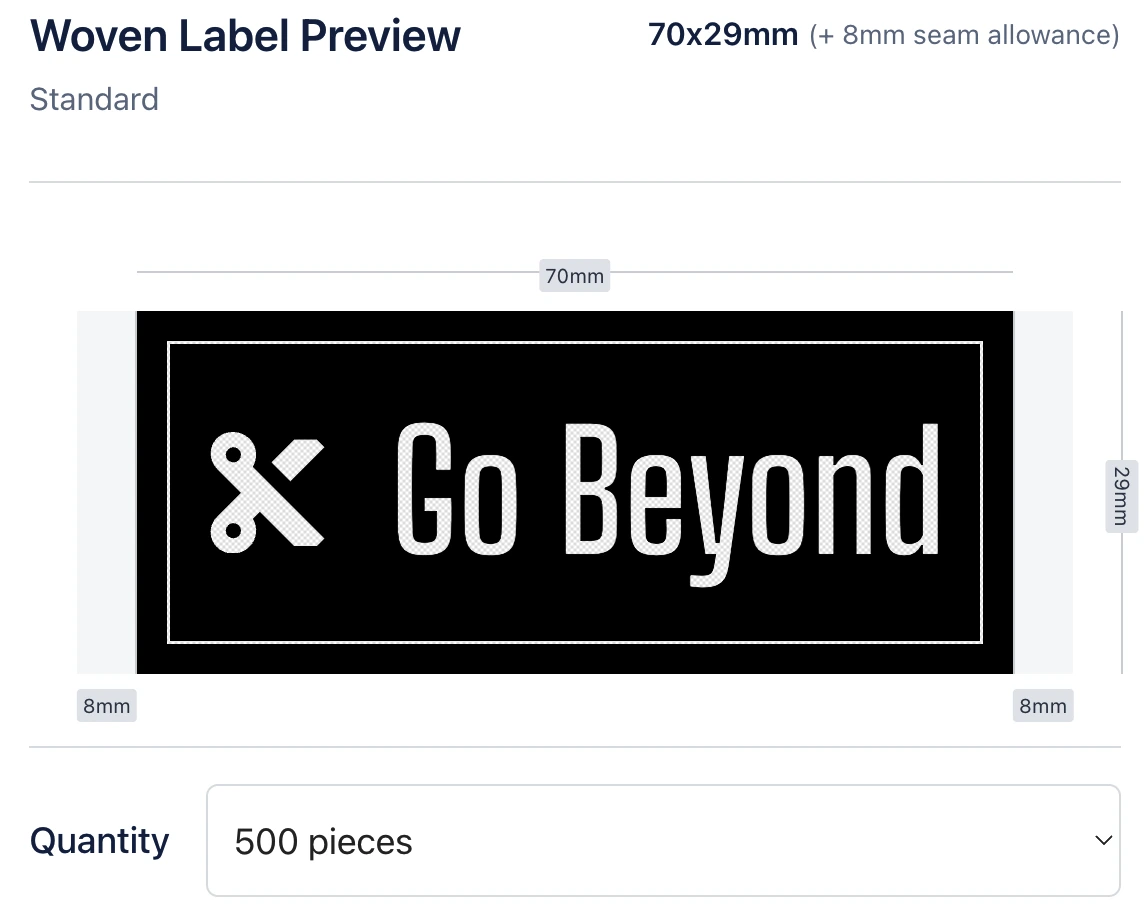 📷 Seam Allowance & Order
You’re Ready to Create with Confidence
Designing high-quality printed or woven labels is now easier than ever. With LabelGo’s Label Studio, you have the tools to create labels that are both visually appealing and production-ready—ensuring your products meet the highest standards of branding and durability.
Label Studio →Looking for More Customization?
Need a different layout, specialty fabric, or unique application method? We’re here to help. Please don’t hesitate to contact us for tailored label solutions that go beyond the standard customization options.
Contact Us →How to Use Care Label Studio
Watch a step-by-step example showing how to create compliant care labels with text and wash symbols.
Choose Fabric Type
Start by selecting the material for your care label. Two fabric options are available:
Satin: A soft, smooth fabric with a glossy finish. Ideal for premium garments, satin labels feel gentle against the skin and offer an elegant look.
Polyester Taffeta: A durable, slightly stiffer material with a matte texture. Perfect for everyday garments, taffeta labels are highly resistant to wear and retain clarity after repeated washes.
Your selection will immediately reflect in the live canvas preview on the right.
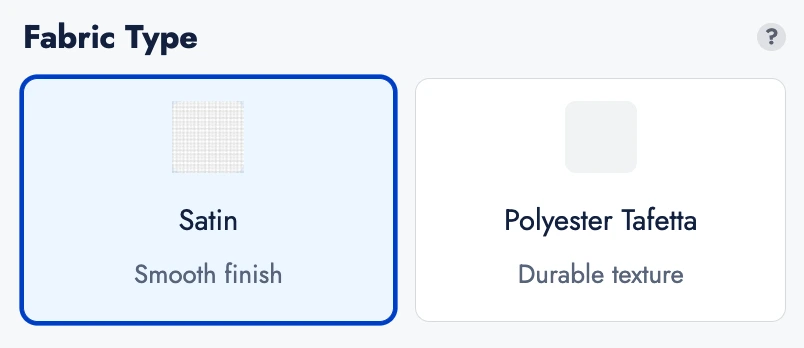 📷 Satin vs Taffeta
Enter Your Text
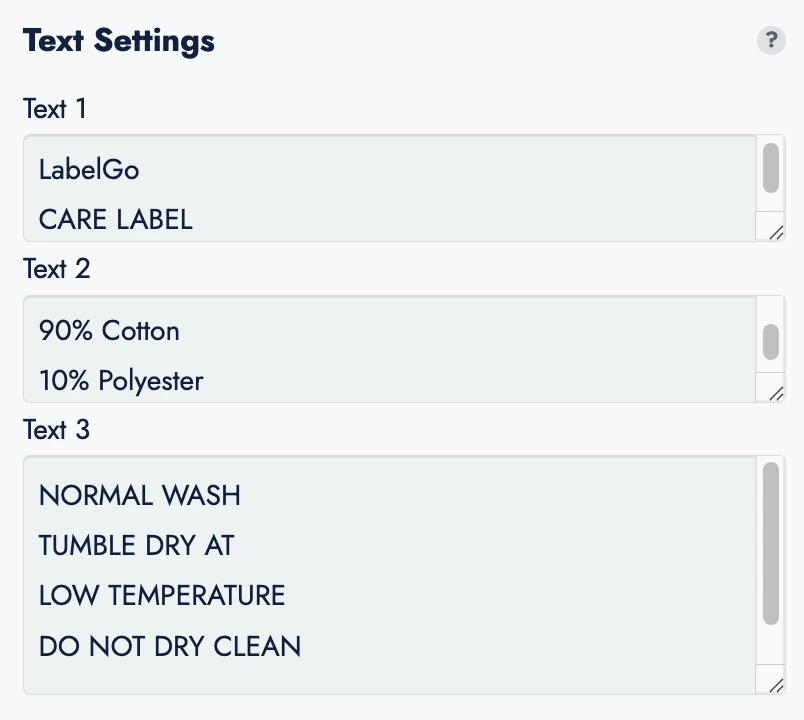
You can add up to three lines of custom text to your care label:
- Text 1 — Appears at the top of the label
- Text 2 — Displays just below Text 1
- Text 3 — Positioned beneath the icon section at the bottom of the label
Just press enter to move to the next line. Use these fields to include brand names, fabric content, country of origin, or any other required information.
 📷 Text & Fabric Content
Customize Font Style
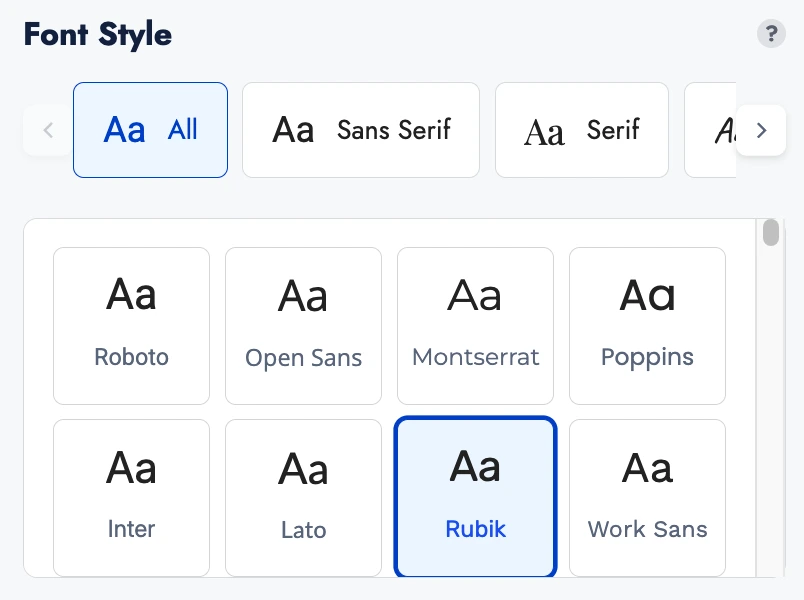
After entering your text, you can change the font style of Text 1 using the font selection dropdown. Choose a typeface that best aligns with your brand’s identity.
 📷 Typography
Add Wash Care Icons
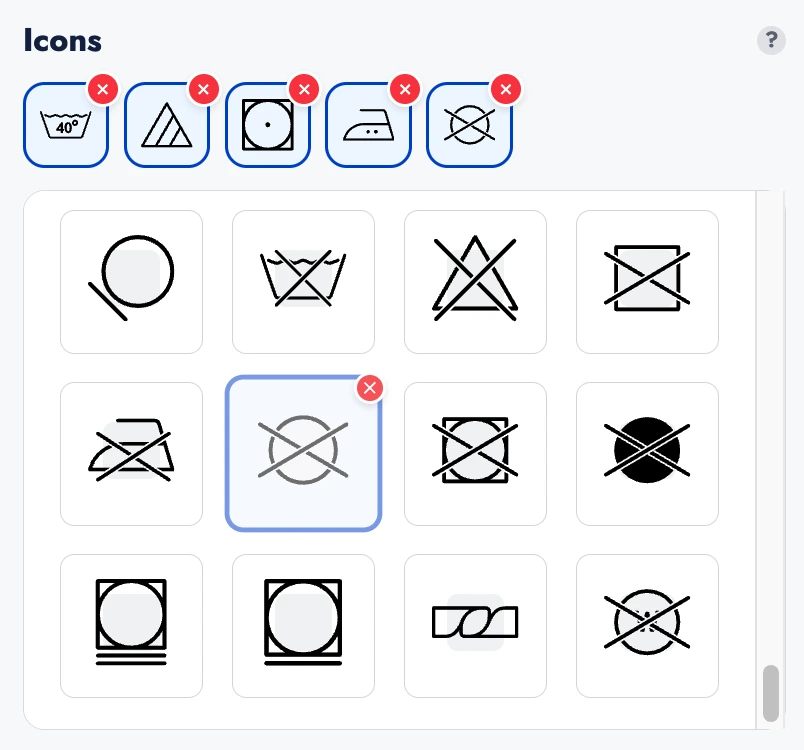
In the final customization section, you can add wash care symbols to your label. These icons help communicate care instructions clearly to the customer and comply with industry standards.
- Select from a variety of icons (e.g., washing, drying, ironing, bleaching, dry cleaning)
- Arrange and position them as needed under your text
Your changes will update live in the canvas area.
 📷 Wash Care Symbols
Review, Select Quantity, and Add to Cart
Once your care label looks exactly the way you want:
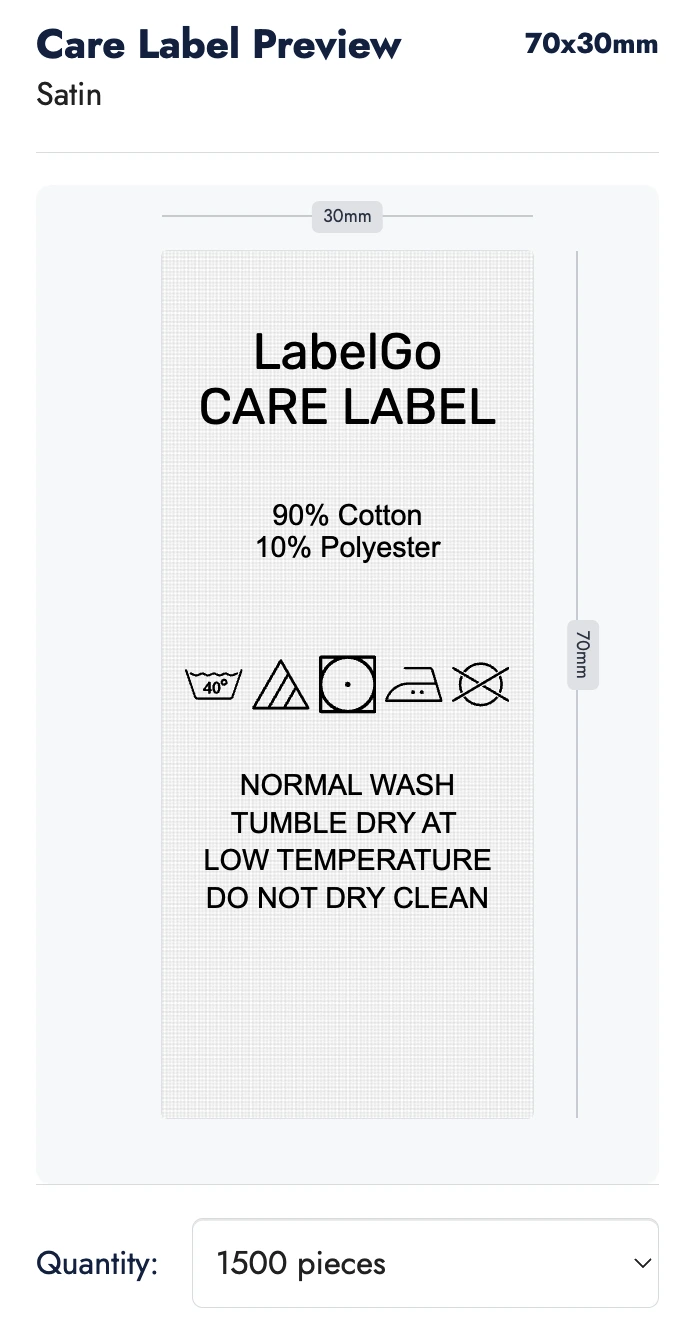
- Review the design in the live preview.
- Choose the quantity you’d like to order.
- Click Add to Cart to proceed to checkout.
 📷 Live Preview
You’re Ready to Print with Confidence
Creating high-quality care labels has never been easier. With LabelGo’s Care Label Studio, you’re equipped to design labels that are both informative and professionally finished ensuring your products meet every standard in style and compliance.
Care Label Studio →Looking for More Customization?
If you’d like to use a different material, explore additional color options, or request a unique layout, we’re here to help. Please don’t hesitate to contact us for fully customized solutions tailored to your needs.
Contact Us →How to Use Tag Studio
Watch a step-by-step example showing how to design custom hang tags and finalize a production-ready order.
Choose the Tag Shape
Start by selecting the shape of your cardboard tag. You can choose from the following options:
- Rectangle
- Square
- Circle (50mm diameter – fixed)
If Rectangle is selected, you can then choose from three size options: Small (40x70mm), Medium (50x90mm), Large (70x120mm). Square and Circle shapes come in fixed dimensions.
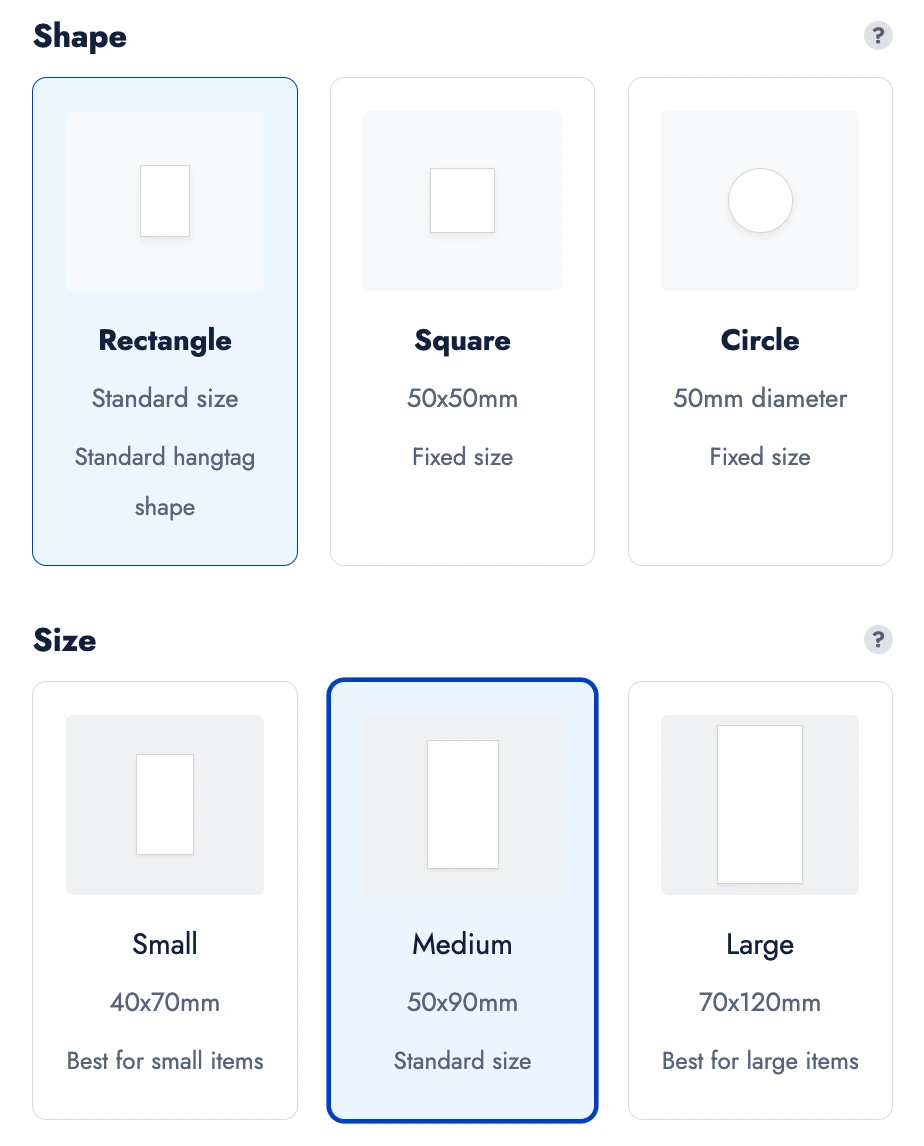 📷 Shape & Size
Select Back Side Option
Next, choose how the back side of your tag will appear:
- Blank – no content on the back
- Same as Front – mirrors the front design
- Different from Front – allows custom content on the back
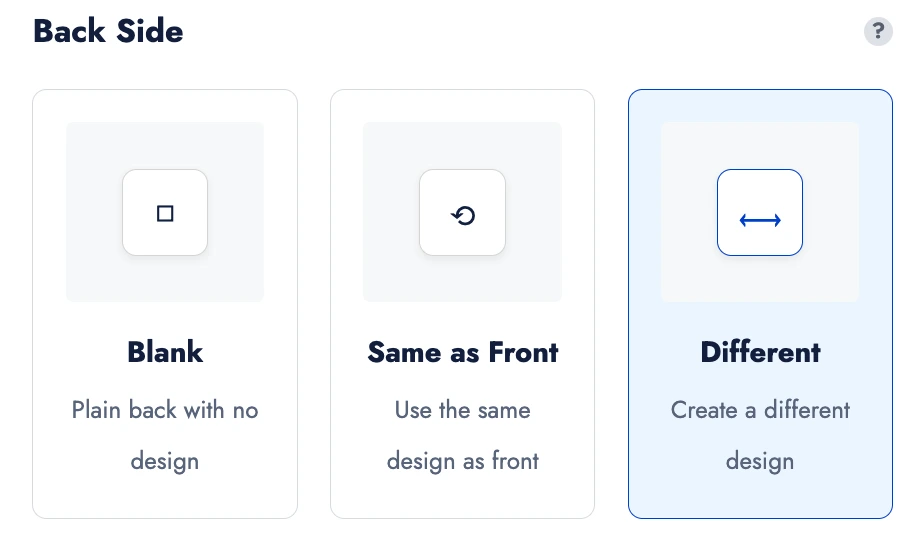 📷 Back Side Mode
Choose Paper Quality
Pick the paper quality that best matches your product:
- Standard – 300gsm white cardboard
- Premium – 400gsm white cardboard
- Recycled – 300gsm organic recycled paper
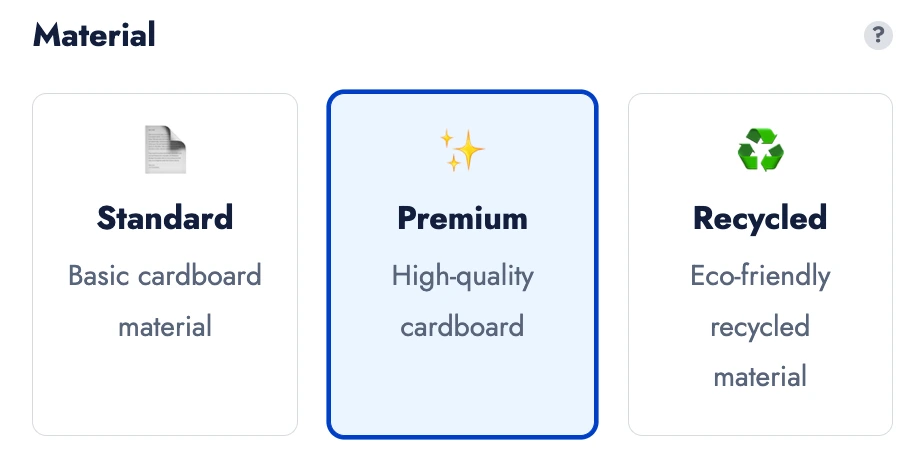 📷 Paper Quality
Add Content (Front and/or Back)
Depending on your back-side selection, upload visuals or add text to either or both sides.
Use the canvas area to:
- Upload images
- Add custom text
- Move, scale, rotate, or align your content for the perfect layout
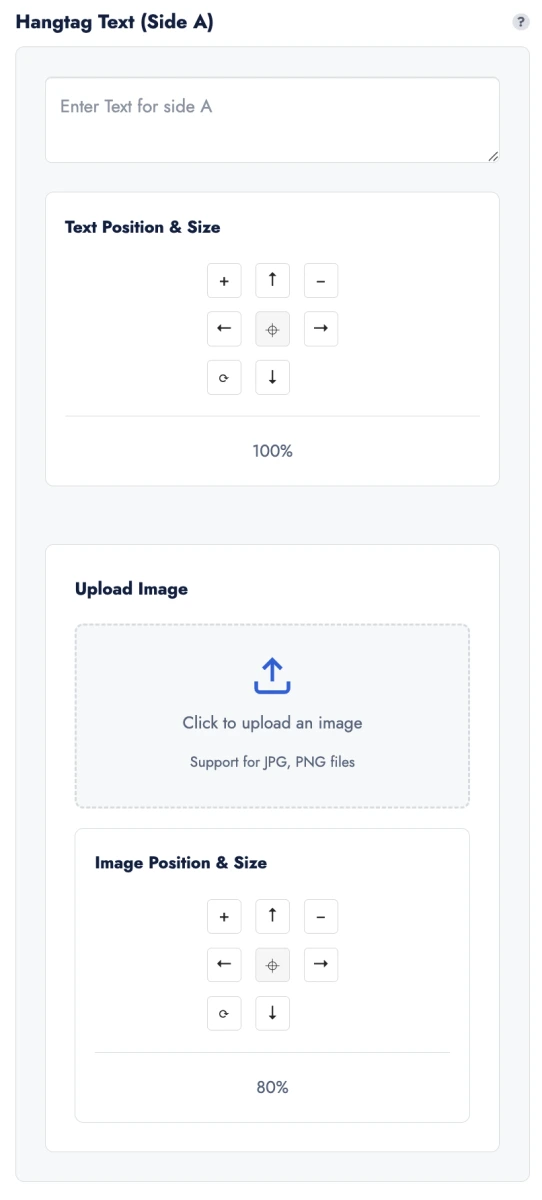 📷 Layout Editor
Choose a Font (If Text is Used)
If you’ve added text, you can customize its appearance by selecting a font that matches your brand identity.
📷 TypographyAdjust Colors
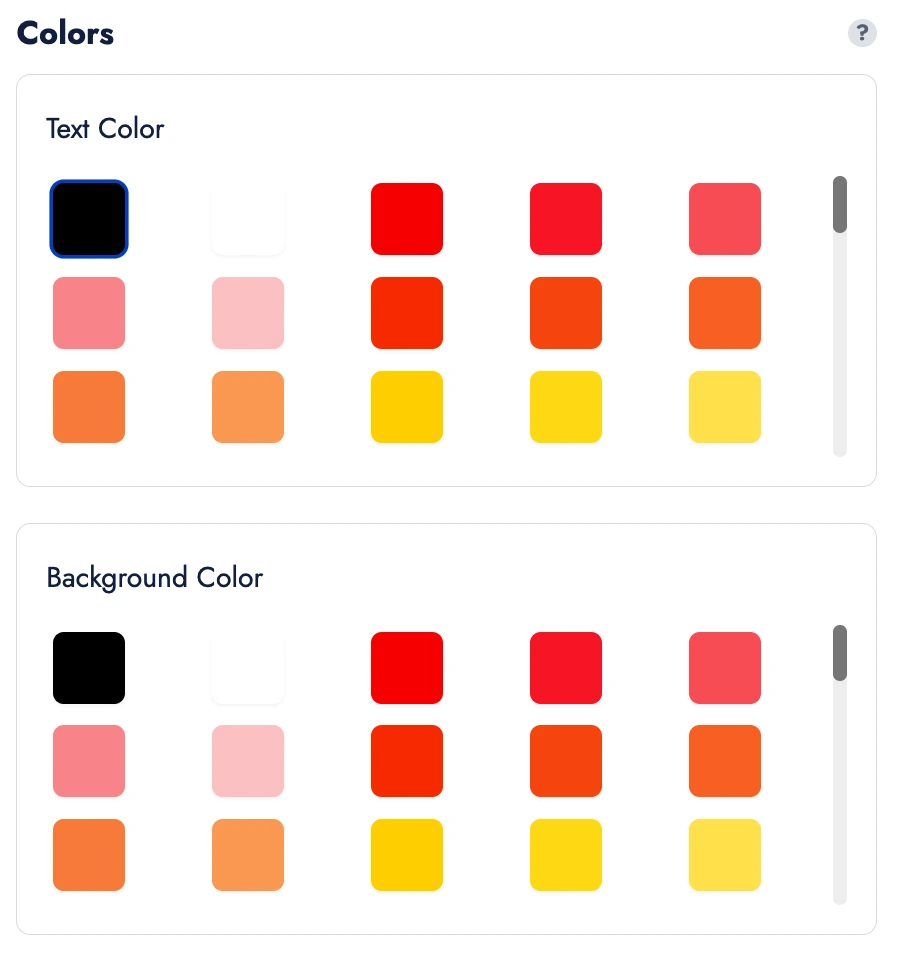
If text is present, you can change the text color.
Additionally, if you have not selected the Recycled paper option, you can also change the cardboard color to suit your design needs.
 📷 Color Palette
Choose Application Method
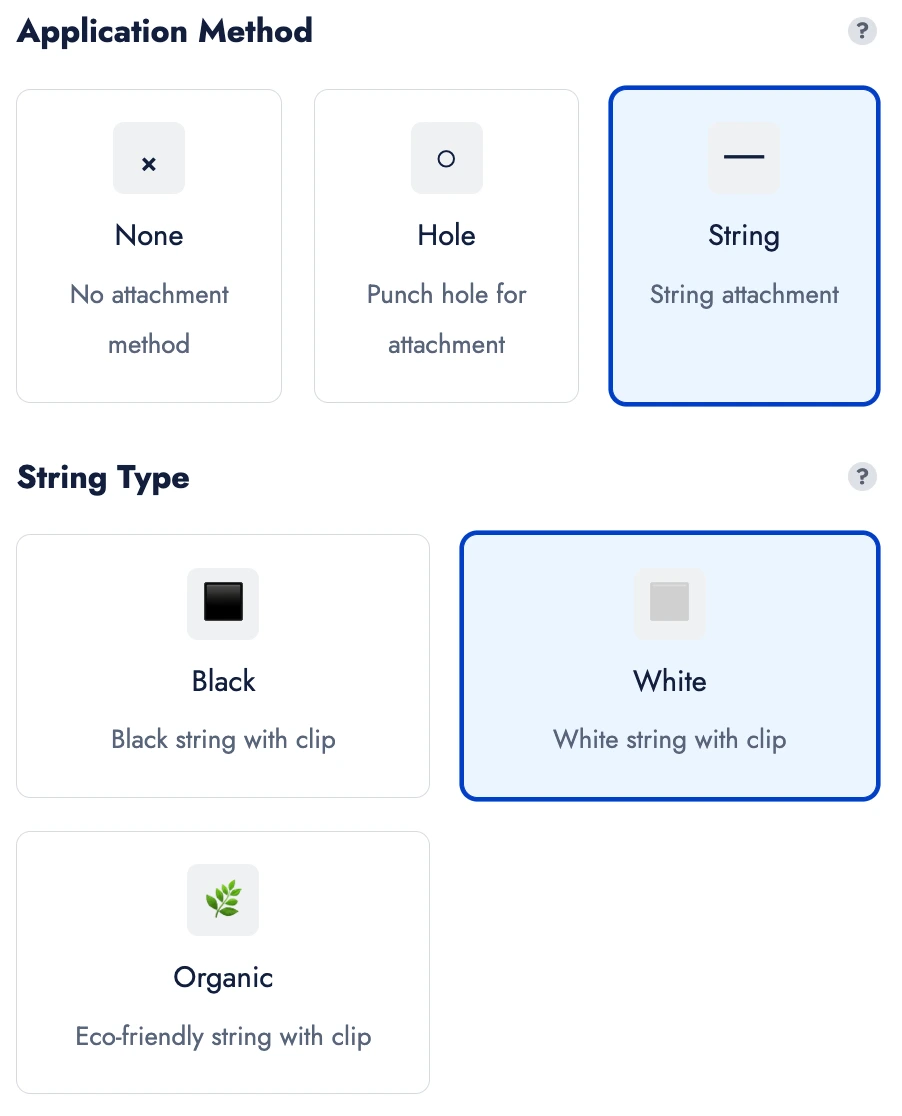
Decide how your tag will be applied:
- None – plain tag without any attachment
- Hole Only – a punched hole for stringing
- Hole + String – select from Black string, White string, or Organic string
All string options are attached with a metal pin for secure application.
 📷 String Selection
Select Additional Features
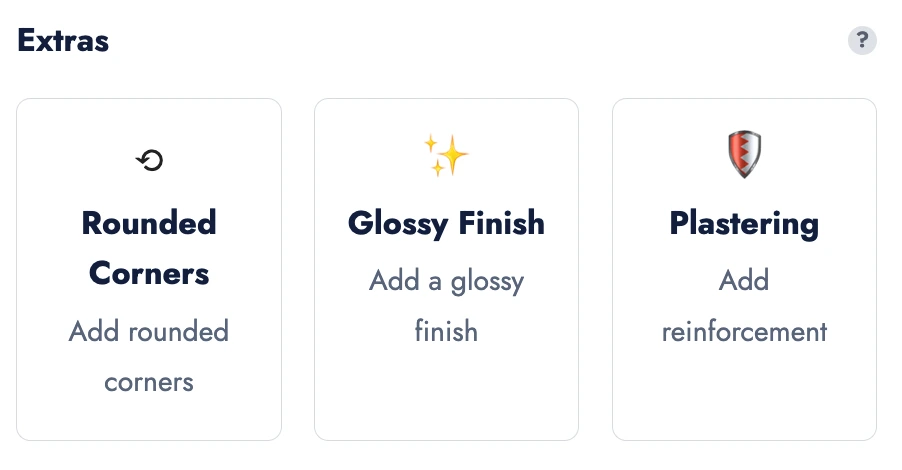
If you’ve selected Rectangle or Square, you can choose:
- Rounded Corners – for a softer look (Please note: Rounded Corners are not available for Circle shapes.)
You can also enhance your tag with:
- Glossy Finish – gives the surface a polished finish
- Plastering – doubles the thickness of the paper for a more rigid, durable feel
 📷 Finishing & Extras
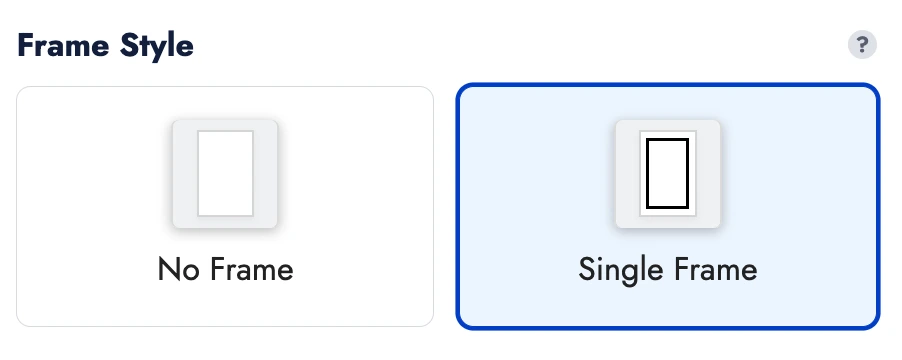
Add an Optional Frame
To further enhance your tag design, you can add a decorative frame around your layout for added emphasis and structure.
 📷 Border Frame
Finalize Your Design
Once your tag is complete, select the desired quantity and click “Add to Cart” to place your order.
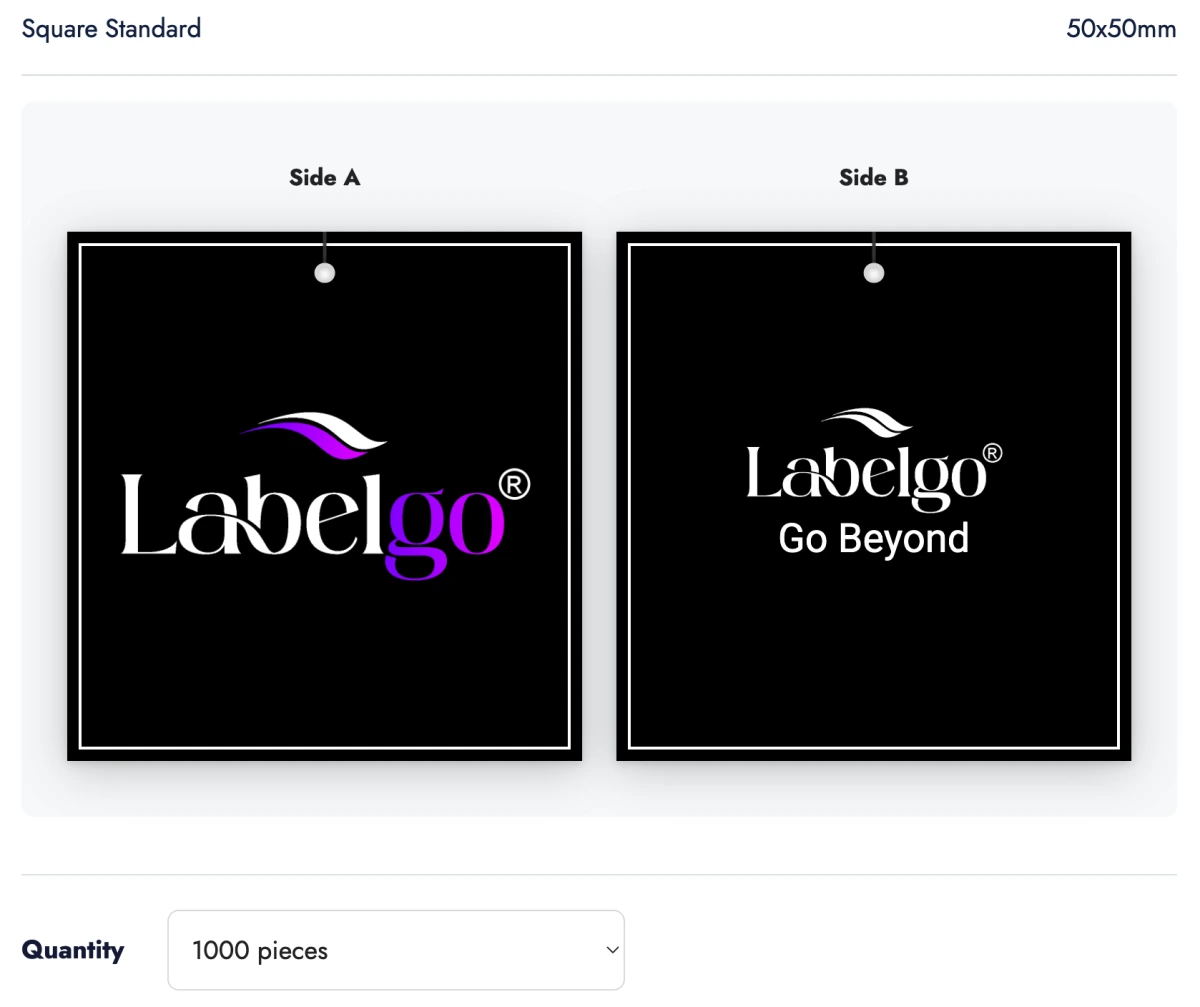 📷 Live Mockup Preview
You’re Ready to Tag with Confidence
With LabelGo’s Tag Studio, you have complete control over your hang tag design, shape, content, texture, and finish. The result? A custom tag that perfectly reflects your brand’s personality and product quality.
Tag Studio →Need a Custom Layout or Special Material?
Looking for different dimensions, materials, or layout options not available in the tag studio? Please don’t hesitate to contact us — we’re here to offer fully tailored solutions to match your exact needs.
Contact Us →How to Use Size Label
A quick and simple way to select predefined size options and manage multiple size variations in a single batch.
Choose the Material Color
Start by selecting the desired label background color. You can choose from: White, Black, Grey.
Select the Size Format
Choose your preferred size system from the dropdown options:
- Letter Sizes: XXS to 3XL
- Numeric Sizes: 36 to 54
These presets cover the most common size labels used in fashion and apparel production.
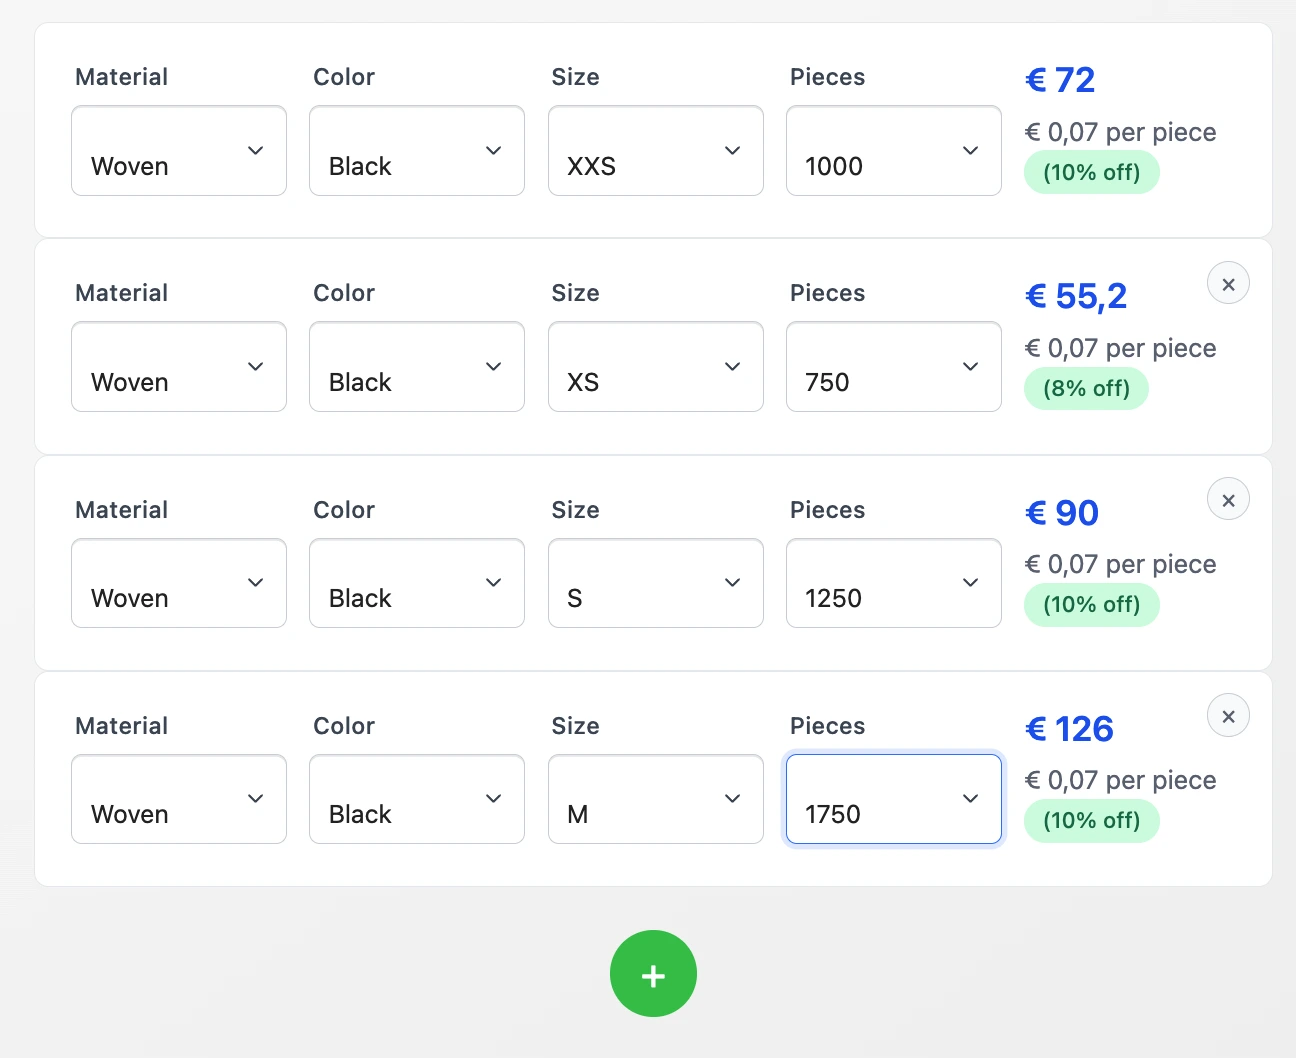
Define Quantity per Size
In the Pieces field, specify how many labels you need for each size.
Add More Variations (Optional)
Need multiple size variations in one order? Click the “+” button to add up to 12 different size combinations in a single batch. Each variation can have its own size and quantity.
Add to Cart
Once all your size labels are configured, click “Add to Cart” to proceed with your order. You’re done!
You’re Ready to Size with Confidence
With LabelGo’s Size Label tool, you now have everything you need to add clean, consistent, and professional size labels that perfectly match your products. Whether you’re labeling clothing, accessories, or handmade items, your size labels are now compatible in both functionality and style.
Size Label →Need a Custom Size Format?
If your required size format isn’t listed (e.g., EU/US hybrid sizing, children’s sizes, or custom codes), we’re happy to help. Please don’t hesitate to contact us for a personalized solution tailored to your production needs.
Contact Us →How to Use Made in Label
Quickly configure origin country labels to fulfill regulatory standards and elevate brand authenticity.
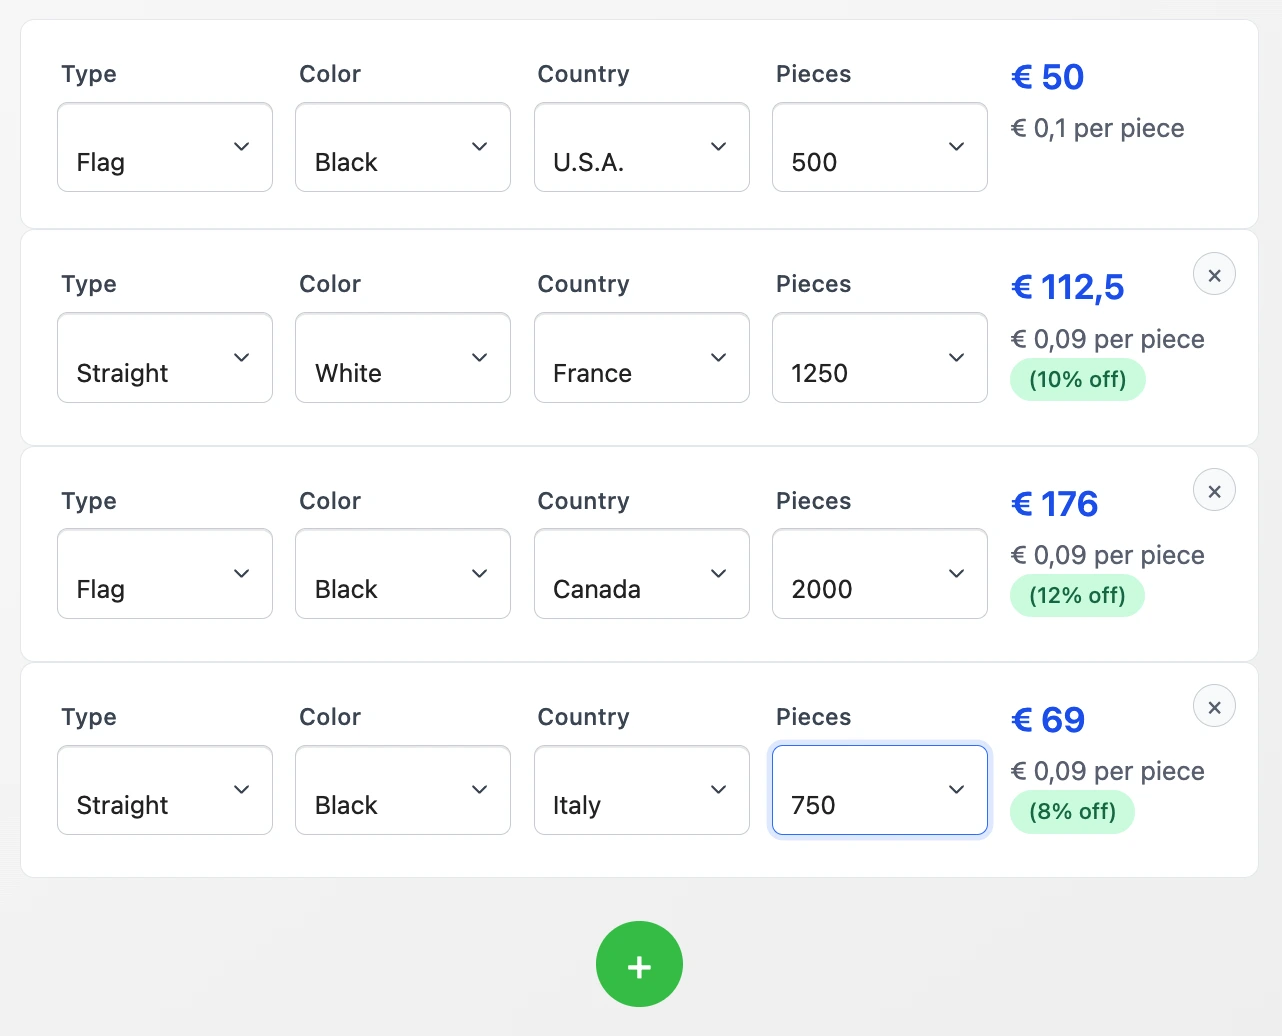
Choose the Label Type
Start by selecting the format of your label. You can choose from:
- Flag Fold – folded label, ideal for side seams or concealed placement
- Straight Cut – flat label, commonly used for back-neck or waistband application
Choose the Label Color
Select your preferred label background color. Available options include: White, Black. This helps you match the label to your product’s material and aesthetic.
Select the Country of Origin
From the dropdown menu, choose the country that will appear on your label. It will be displayed in the format: Made in [Country].
Add More Variations (Optional)
Need multiple size variations in one order? Click the “+” button to add up to 12 different size combinations in a single batch. Each variation can have its own size and quantity.
Add to Cart
Once all your made in labels are configured, click “Add to Cart” to proceed with your order. You’re done!
You’re Ready to Label with Origin Confidence
With LabelGo’s Made In Label tool, adding country-of-origin information to your products has never been easier. Whether you’re fulfilling legal requirements or highlighting local craftsmanship, your labels now speak clearly and professionally—just like your brand deserves.
Made in Label →Need a Custom Country or Format?
If your required country, language, or layout isn’t listed, we’re happy to help. Please don’t hesitate to contact us for a personalized solution tailored to your production needs.
Contact Us →